So I kind of needed to give someone something and I thought I’d try my hand at these–and Gillian Polack is entirely right, they are dead easy to make and so so good! You can replace oranges with any citrus fruit (I kind of want to try lemon now).
Recipe here. I’m not posting a picture of the orangettes (the chocolate-candied peels) because mine ended up looking a bit weird due to coating issues with the chocolate (they still taste great though, but they’re not very presentable!).
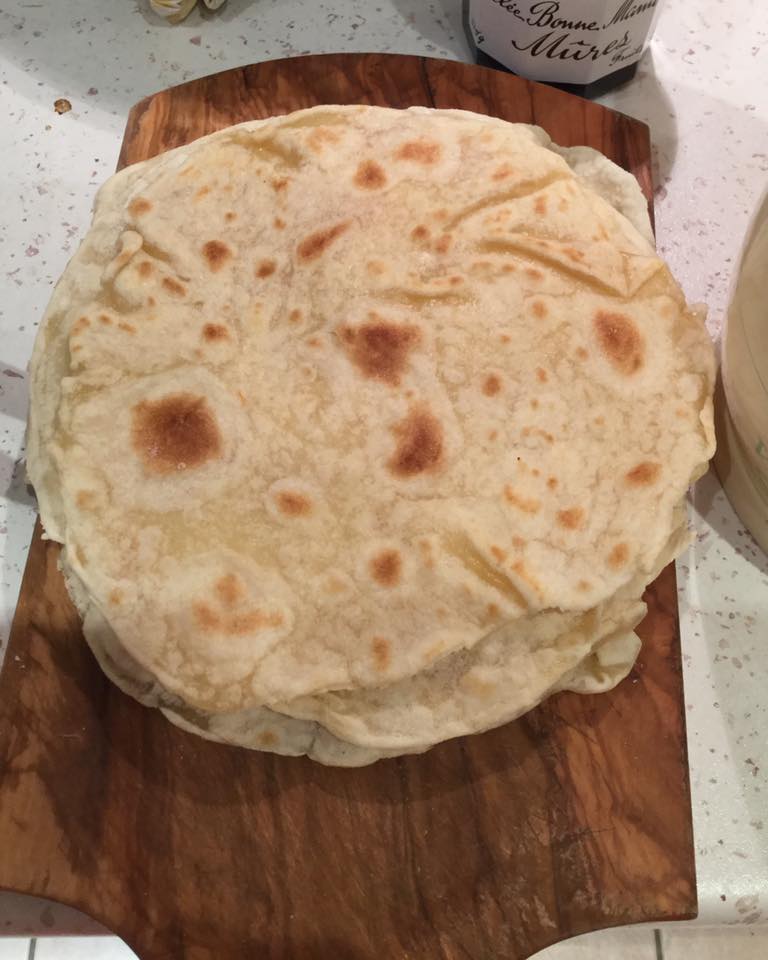
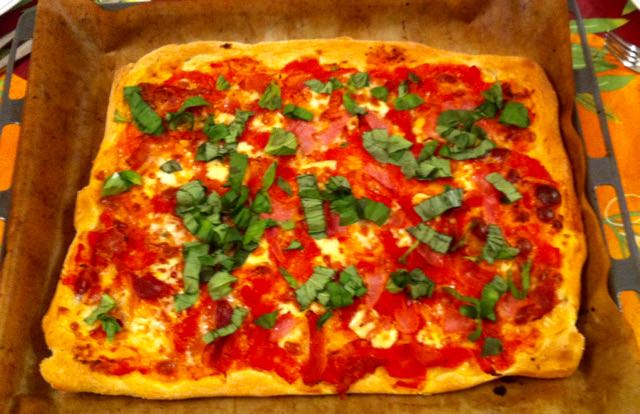
So, this was the year of cooking courses: I got a pack of two for my birthday plus Christmas, and I picked two things which I’ve always wanted to get some hands-on instruction on. The first was pizza making, and the second was dim sum.
The H was the one who pointed out the pizza making course to me: it’s a group thing organised by l’Atelier des Sens, which has a range of cooking courses that go from making your own bread to detailed, week-long courses for people who want to become chefs or simply terrific home cooks. The course itself was near Les Halles, which is handily located in the centre of Paris, in a large, kitchen with a huge work counter (fortunately, because 12 of us mixing pizza dough at the same time got a bit chaotic). We covered pizza dough (flour, yeast, kneading), and pizza toppings, and made different combinations that we ended up eating afterwards. Yum.
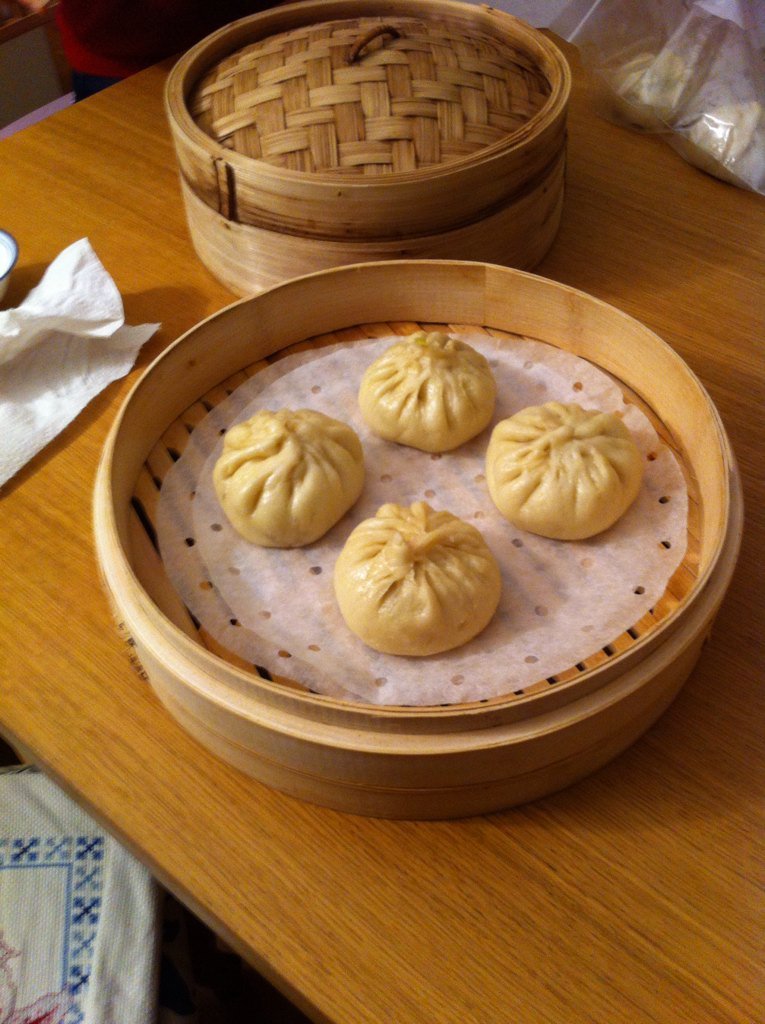
It’s, of course, hopeless to hope to cover the full range of dim sum making in a single 3-hour course, so I went with Margot Zhang’s course on making bao (buns which came down to Vietnam in a slightly different, fluffier version, bánh bao). She does group courses (4 people at a time), but alas, I couldn’t make it to one and ended up on a one-on-one course. Margot is awesome and very knowledgeable, and covered everything from making the dough to folding the pleats neatly. My first attempts were disasters. The picture you see above is my second batch, by which point she’d showed me an alternative way to fold the dough (on the counter as opposed to freeform in the air, and with a slight change of guiding hands).
The resulting dough is… interesting: bánh bao is made, insofar as I can tell, from a different flour (Hong Kong flour, which is very white) and possibly includes a bit of rice flour and some milk, so I was expecting something a little more fluffy than I actually got. But they tasted divine (the H confirms ^-^).
The cooking classes are both, as you can guess, very different beasts. I liked the Ateliers des Sens one a lot–very clearly pro and a smoothly oiled machine, my only comment is that there were 12 of us in the room which was a little too many I think? In a “really big group” thing like this I feel like you don’t really get a chance to handle everything. But the chef’s great and always really helpful, and it’s really geared towards making do with what you have in your kitchen without building a stone oven (which, let’s face it, not many of us will do).
The Margot Zhang course is a one-on-one, and as such it’s a very different beast: I got to do everything, and to see where I was failing–my pleating technique, for instance, improved markedly when I had to pleat 15 baos in a row! You naturally get more instructor time in a situation like this. And it ended up aimed specifically at me: namely, some cooking experience, some experience handling bread/wheat dough, and a reasonable familiarity with the ingredients we were using (sesame oil and rice wine). The price range, of course, isn’t the same, though due to Margot’s prices being more than reasonable, both this and the pizza making class ended up in the same hourly rate ballpark (it was 75 euros for 3 hours, and I ended up bringing 10 big buns of pork-filled goodness home in addition to the recipe).
Margot has just started doing cooking classes full time instead of her work teaching Chinese, and if you’re looking for that extra oomph to your cooking I would highly recommend you give her a look . She also does beginners classes, but I was obviously a little bit less interested in that :p
So… I discovered about Japanese Knife Company online, and also that they ran knife sharpening classes. Which was kind of handy, as colleagues gave me a set of Kai Seki Magoruku knives about six years ago, and that I’ve not been a pro at keeping them maintained… The shop is in the 12e, so not exactly next door to me, but it was a great excuse for a (lengthy) expedition for a two-hour class that was well worth the time (though it was actually a lot more time than that–many thanks are due to the H who did the snakelet wrangling).
The shop itself is kind of a Mecca for Japanese knife lovers–they sell everything from entry-level (around 100 euros) to, er, much much more expensive. They also sharpen knives: in fact, while I was there several people (mostly professionals, that I could see) dropped their knives off and came in to buy supplies, and they sharpen both Japanese and Western knives. In fact, if I was in the market for a knife sharpener they’d probably be among my first choices.
What follows are my notes, which are kind of fragmentary because I wasn’t actually taking notes, rather trying to follow along 🙂 No guarantees whatsoever, this is what I understood and I’m not a pro (and it’s also knife sharpening 101–you can find a better class of advice here at Serious Eats).
The class started with an intro course on the various kinds of steel: stainless steel is what most Western knives are made of, and is resistant to corrosion, flexible and middling solid–mostly it doesn’t hold an edge well, which means you have to sharpen aggressively and often. Carbon steel is not as flexible but holds an edge better: the drawback is that the more carbon you put in a blade, the more fragile it becomes. Also, it’s more susceptible to corroding, which means that you usually add some other metal like chromium or tungsten so that your blade doesn’t rust at the mere sight of water. Some bright souls came up with the idea of laminated steel, which is sandwiching a hard steel blade (for the edge) between two layers of softer steel: a combination of a good edge, an easy to sharpen blade (because of the soft steel), and something that won’t actually chip *too* often on you. From there on, you climb into more worked steels: Damascus Japanese blades are made with several of these layers (anywhere from 30 up) and are a. more expensive b. more durable.
(then it gets more technical, and I confess I got a little lost, especially as most other participants were enthusiasts about steel–I felt very much like a hobbyist who’d wandered in by error at some points 🙂 Also, it will not surprise you that I was the only woman on that course, which mostly became a problem because the counter was very high and I had to stand on a stool to make sure I got the right height for sharpening)
Sharpening stones have different grits: the lower the grit the coarser the stone. 120 is what you use for a stainless steel, and the more carbon there is your blade the higher you need. There’s generally two (or more) passes necessary: you go from a coarse grit to a finer grit, so for instance the knife we sharpened was stainless steel and we had a 120/1000 stone; a 3000 stone will have close to zero effect on a blade that’s low on carbon, but a 6000/8000 stone might well be all you need to keep a Damascus knife sharp .The coarser the stone, the more metal it shaves off from your blade, which of course is bad for the longevity of high-carbon blades. The whetstones are waterstones, which means you have to moisten them with water (how depends on manufacturer’s instructions, the ones we had had to be completely immersed), and then keep wetting them to make sure your knife doesn’t bite into them (the coarser your stone, the more often you have to sprinkle water on top of it). You also have to semi-hemi regularly flatten them (he did this with a diamond stone in the shop, but advised us to use a ceramic tile and lots of water at home as it was cheaper–it won’t work on 120 stones, but anything from 1000 upwards can be maintained flat with this method).
The key to having a sharp knife is having a constant angle along the length of the blade–it’s not always the same angle (some knives are 70°/30° for instance), and it doesn’t necessarily have to be the original angle the knife was given (though if you deviate too much from it you’re basically reshaping a knife, which isn’t recommended). Japanese knives are usually and roughly a 15° bevel, but you can have 16/17/18 as long as you keep that angle. Western knives are more U-shaped: the angle is closer to 22.5°.
We then moved on to practice, basic gestures etc., which is where, uh. I discovered that basically I can’t keep a constant angle when moving a knife over a whetstone. Remember the bit about the angle being key? Yeah. Turns out I’m not very good at it. “abysmal” would be a better description of what I can do, in fact. They finally took pity on me and gave me a guide, which isn’t 100% recommended but–for me–made all the difference between having a disastrous blade and something that was semi-hemi-correct.
End result is also that our knives were in a rather disastrous state due to neglect: the blades were chipped in multiple places and basically I’m going to have to redo them from scratch. It also turns out they’re this kind of weird limbo thing where the steel isn’t very much enriched in carbon, making them closer to a Western knife–but shaped like Japanese knives. Go figure. Anyway, I walked out of there with a coarse stone, the guide (which they were kind enough to leave to me), and instructions on how to get them up to reasonable shape.
I. Hum. Also got a laminated-steel nakiri because it was so pretty. Sorry not sorry.
(and would I recommend the class? Definitely if you want to get the basics on knife sharpening on water stones, and not only for Japanese knives. It’s very hands-on, they’re super nice even to a total novice like me, and I hope I can put some of that into practice… Though you might curse me afterwards, as their knives are so pretty. So so pretty. They have several locations in London as well, though their sharpening classes are an order of magnitude more expensive than what I paid for this one).
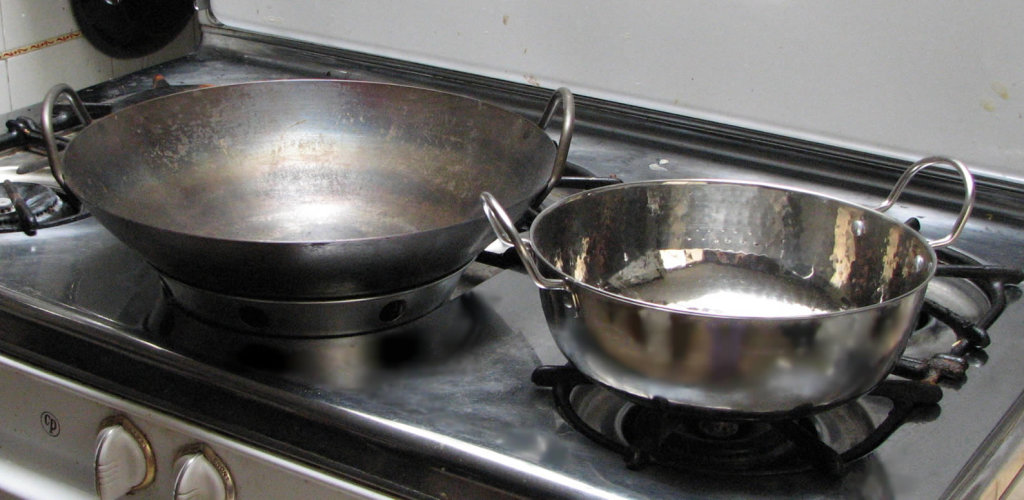
The above is my lovely wok with its developing patina–I’ve been using it for a month or so and it’s fascinating to watch it slowly browning. I hope it gets all brown, but I understand that it can take years before that happens! Been cooking a bunch of greasy foods in it to help season (crab fritters, lardons), and using Grace Young’s method of dumping the rice water in it and soaking for 20 minutes to clean it (mostly because it does save a bit of water 🙂 ). Really nice to have browned chicken and steaks again, I have to say. Maillard reactions in a non stick pan just don’t really happen…
Also have been trying to update my knife-wielding skills on Craftsy. I think I’ve got the low cut (for small veggies) worked out, but the high cut is still a problem (my arm and shoulder ache, which mean I’ve probably screwed up somewhere). Ah well. Onwards and upwards!
And not a cooking thing, but check out this: Those who Run with Wolves. I’ve set up a project focused on books that get elided one way or another–my hope is that you can read this and discover a book you missed out on, find an old favorite, or stumble across a new, exciting release. I’ve got wonderful people on board, and we hope to cover a mix of new releases and old classics.
So… as part of my “Aliette goes learning new ways of cooking”, and after the baking experiments, I’m now into using a carbon steel wok (mostly, I confess, because our non-stick one died about a month ago and I was really sick of replacing it every few years). I read Grace Young’s Breath of a Wok and Stir-Frying to the Sky’s Edge cover to cover, bought a wok from our local Chinatown, and then proceeded to do my own experiments [1].
There’s surprisingly little that I could find about using a wok on a glass stovetop, and I thought that I would accordingly post about it, if only to share. A lot of the stuff in Grace Young’s books and online focuses on electric stoves (which means coils, I assume), and warn you that an electric stove isn’t powerful enough to do stir-frying and you need to crank up the heat to maximum.
On my stove at least, this results in disaster. Because woks (and the de Buyer steel pans that I have) don’t like being heated fast, and also don’t much like having the radiant element of the stove right under them. And as a result, they warp, which is a big pain in the neck (and not something you can remedy once it’s happened, at least not without a lot of work that I’m in no way ready for), and they “dance” on the stovetop, i.e. don’t lie perfectly flat. The Wok Shop in San Francisco has an FAQ which describes the problem, which makes me think I’m not the only one to have it.
A carbon steel wok would probably warp as well on an electric coil or gas stove (though I suspect the flames of gas are a less violent contact than the full heat of the radiant element), but the thing is you probably wouldn’t notice it. Glass stovetops, unfortunately, are really unforgiving in that regard: the bottom of pans has to be absolutely flat, whereas it’s not really a problem if your wok is slightly warped and you’re cooking with gas or coils.
It might be linked to the wok gauge, but I’ve got a thicker de Buyer steel pan which has the exact same problem, so I suspect a wok would have to be very thick (and very heavy, and kind of defeating the point of reacting fast to the heat), in order not to warp. Also, I’ve killed one wok not knowing this (the one I have is my second one), so for what it’s worth…
(you might have a less, er, eagerly destructive glass stovetop which doesn’t heat up fast. In which case you can safely ignore most of this advice)
So, accordingly, my new cooking rules with a carbon steel wok on a glass stovetop:
Find the right burner: on my stove the largest burner (which is actually larger than the wok base) is the friendliest and the least likely to warp the wok.
Heat it up gradually (every stove is different. Mine must heat up fast, because I need to do 5 minutes on low heat, 5 minutes on low-medium heat and 5 minutes on medium heat before the wok is at the right temperature)
If you have one of those powerboost things on the stovetop that make the stove heat up faster, for the love of God do NOT use it, it’ll kill the pan in the long run.
Watch for temperature (on my stove I go to 7-7.5/9, seldom to the maximum). You’ll notice that the de Buyer FAQ for their steel pans says never go above moderate heat. Trust me, even moderate heat on an efficient stove is good enough for stir-frying.
After you’re done, let the wok cool on the stove. Never EVER take it straight into the sink to pour some water into it.
(in the interest of full disclosure: my wok is the Ken Hom 31-cm carbon steel. My stove is made by Bosch but I have no idea which model it is, as it came with the house. Also, all of this applies to thin carbon steel pans like the de Buyer ones).
[1] If you want a quick book review: they’re great books because they focus on one technique and have inserts on how to do things, rather than being a compilation of recipes (I like compilations of recipes, but sometimes you need to pause and learn a bit about technique). The Breath of a Wok has a slightly better and slightly more expanded wok selection and wok care section (at least I found it more useful), and Stir-Frying to the Sky’s Edge is better on preparing ingredients for a stir-fry (cutting them, blanching them, etc.). Sky’s Edge is also more focused on the Chinese diaspora (mostly in North America and the Caribbean) and on how they adapted their dishes.
[ETA: edited some grumbly things which didn’t bring a lot to the review]
I’ve got some light peeves, but nothing serious: I thought both books were superb and well worth a read and/or add to your cooking library if you intend to go wokking.